The following article describes embedded java script toolkit in brief and provides a step by step approach to implement it using ajax in a custom JSR 286 portlet.
Introduction:
Embedded JavaScript (EJS) is a JavaScript template library, commonly used for building html strings from JSON data. EJS cleans the HTML out of JavaScript with client side templates.
Whenever AJAX is used in web development it is always a problem to deal with the response and generate markup based on the AJAX response. Normally to deal with the response the most general approach is to create dynamic HTML and generate the presentation layer. The following code snippet shows this approach
var html = "<h1>"+ajaxResponse.title+"</h1>"
html += "<ul>"
for(var i=0; i< ajaxResponse.data.length; i++) {
html += "<li><a href='supplies/"+data.entry[i]+"'>"
html += data.entry[i]+"</a></li>"
}
html += "</ul>"
But, the problem in this approach is, the structure of the HTML is lost in between the JavaScript logic. And in case of the big and complex markups, it is almost impossible to create and manage the JavaScript logic and markup HTML together. To handle this kind of scenario, EJS can be very useful. EJS separates presentation markup from JavaScript logic very well. EJS works like the following
Here,
HTML represents the markup part.
Data represents data in JSON format that is coming from AJAX response.
Template is something which EJS provides.
EJS separates the presentation markup into a separate file called template. Template is a file with a “.ejs” extension. For example: “myPageData.ejs”. Following is the code snippet of a sample template.
Everything inside <% %> tag is executed and everything inside <%= %> tags inserts itself into the returned HTML string. A specific JavaScript syntax is needed for loading and rendering of the template. The following code snippet shows the syntax.
To get the templates working, the page needs to include EJS so your JavaScript can use it. The following code snippet shows the syntax.
Example :
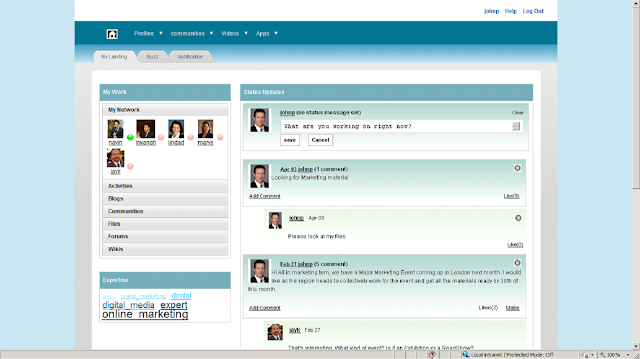
Let’s take a real life example. In our example we have implemented EJS with DOJO in our Social collaboration Portlet (JSR 286) application. Following are the steps.
Creates the DOJO XHR method (xhrGet(), xhrPost() or xhrPut()) to call your AJAX Servlet or Portlet. Following is the code snippet
function onAddButton(){
var xhrArgs = {
url: "<%=renderResponse.encodeURL(AddServerResourceURL.toString())%>",
form: dojo.byId("statusUpdateForm"), //ID of the HTML Form
handleAs: "text",
load: function(data) {
var jsonObj = eval('(' + data + ')'); //AJAX Response
var callback = new EJS({url : '<%=renderRequest.getContextPath()%>/_ProfileStatusUpdates_JSR286/templates/page.ejs'}).render(jsonObj); //Rendering of the EJS template
dojo.byId("theMenu").innerHTML = "";
dojo.byId("theMenu").innerHTML = callback;
},
error: function(error) {
alert(error);
}
}
//Call the asynchronous xhrPost
var deferred = dojo.xhrPost(xhrArgs);
}
2. The AJAX url needs to be constructed to call the ServeResource() method of the portlet. Following is the syntax.
<portlet:resourceURL var="AddServerResourceURL" id="ADD"/>
<portlet:resourceURL var="DeleteServerResourceURL" id="DELETE"/>
<portlet:resourceURL var="AddCommentResourceURL" id="ADD_COMMENT"/>
<portlet:resourceURL var="DeleteCommentResourceURL" id="DELETE_COMMENT"/>
3. The AJAX method will invoke the serveResource(ResourceRequest request, ResourceResponse response) of the portlet. Inside the method we will invoke the corresponding methods based on the resourceID (“ADD”, “DELETE”, “ADD_COMMENT” or “DELETE_COMMENT “). Following is the code snippet.
public void serveResource(ResourceRequest request, ResourceResponse response)throws PortletException, IOException {
String userId = request.getRemoteUser();
String jsonString = null;
String responseType = null;
String resourceId = request.getResourceID();
try {
if(null != resourceId && resourceId.equals("ADD")){
String addCommentText = request.getParameter("addStatusTextArea");
responseType = MyStatusUpdatesHelper.addEntry(userId, addCommentText);
}else if(null != resourceId && resourceId.equals("DELETE")){
String deleteLink = request.getParameter("deleteUrl");
responseType = MyStatusUpdatesHelper.deleteEntry(userId,deleteLink);
}else if(null != resourceId && resourceId.equals("ADD_COMMENT")){
String entryId = request.getParameter("entryId");
String CommentText = request.getParameter("addCommentTextArea");
responseType = MyStatusUpdatesHelper.addComment(userId,entryId,CommentText);
}else if(null != resourceId && resourceId.equals("DELETE_COMMENT")){
String deleteCommentLink = request.getParameter("deleteCommentUrl");
System.out.println(deleteCommentLink);
responseType = MyStatusUpdatesHelper.deleteEntry(userId,deleteCommentLink);
}
if(responseType.equals("SUCCESS")){
List<ProfileUpdatesBean> statusUpdatesList = new ArrayList<ProfileUpdatesBean>();
try {
statusUpdatesList = MyStatusUpdatesHelper.getProfileStatusUpdates(userId);
jsonString = JsonHelper.getJson(statusUpdatesList, userId);
} catch (URISyntaxException e) {
e.printStackTrace();
}
}else{
}
} catch (URISyntaxException e) {
e.printStackTrace();
}
response.getWriter().write(jsonString);
}
4. As shown in the code above, After invoking the methods of the MyStatusUpdatesHelper class, we have checked the responseType. If it is “SUCCESS” then call the getJson() method of JsonHelper class. Pass the java object that was returned by the MyStatusUpdatesHelper class. This getJson() method will convert the java object into JSON object and return. Following is the code snippet.
public static String getJson(List<ProfileUpdatesBean> statusUpdatesList, String userId){
StatusUpdatesParentBean bean = new StatusUpdatesParentBean();
bean.setLoggedinUserId(userId);
bean.setProUpdateList(statusUpdatesList);
Gson gson = new Gson();
String Json = gson.toJson(bean);
return Json;
}
5. Once the JSON object is returned, we have sent that in respone using write() method of response.getWriter().
6. Once the response is back, we convert the JSON String to JSON object using the following syntax
var jsonObj = eval('(' + data + ')');
7. After that, just invoke the render() method EJS on the template and pass the JSON object as parameter. The template is attached.
8. Finally, markup generated by the template, has to be inserted into the page markup using the following syntax.
dojo.byId("theMenu").innerHTML = "";
dojo.byId("theMenu").innerHTML = callback;
Here, “theMenu” is id od a HTML DIV element.
This way AJAX can be implemented with ease using EJS. EJS has the following advantages
Building HTML strings with JavaScript:
As we discussed in this tutorial, the problem of HTML string concatenation in JavaScript is maintainability. When adding together HTML in JavaScript strings, it is difficult to see the big picture of what you’re creating - a representation of the layout for your page. Using templates makes layout easier because you can see the HTML and preserve line breaks and spacing.
AJAX web development with web services:
EJS accepts JSON coming in asynchronously from a web service, passes this data into a template of your choosing, and inserts the resulting HTML into the page for you. Only the following line of code is needed.
new EJS({url: 'comments.ejs'}).update('element_id', '/comments.json')
Application skinning:
If user wants to give wer to customize their own look and feel, EJS provides the perfect mechanism. EJS templates execute in the browser only, so there is no security risk to your server. Allowing users to upload EJS templates and associated stylesheets is the easiest and fastest way to skin your site.
References :
-
-


