The following article describes a simple and step by step approach of customizing IBM Connections 3.0 using Web Application Integrator (WAI)
Introduction:
Web Application Integrator for IBM WebSphere Portal is a solution which allows external web applications to be integrated with WebSphere Portal. Examples of such external web applications include IBM web-based products like Lotus Connections, Lotus DWA, and Lotus Quickr, as well as other web applications within the enterprise. Following are the steps that need to be followed to integrate for IBM WebSphere Portal with IBM Connections.Install the Install Web Application Integrator portlet:
The installation kit can be downloaded from the following location.
https://greenhouse.lotus.com/plugins/plugincatalog.nsf/assetDetails.xsp?action=editDocument&documentId=31AC15EF8BF546DF85257700005C50BE
The installation kit installs the Web Application Integrator portlet and adds it to the "Manage Pages" page.
https://greenhouse.lotus.com/plugins/plugincatalog.nsf/assetDetails.xsp?action=editDocument&documentId=31AC15EF8BF546DF85257700005C50BE
The installation kit installs the Web Application Integrator portlet and adds it to the "Manage Pages" page.
Create a standard Portal URL page:
1. Log into Portal using an ID with administrative access rights.
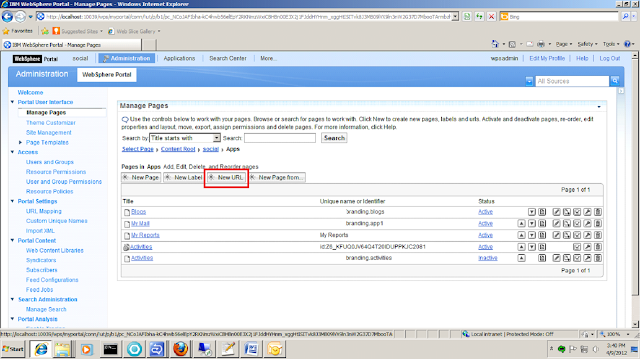
2. Go to the Manage Pages portlet, located on the "Manage Pages" page under Administration / Portal User Interface.
3. Click "New URL" button.
2. Go to the Manage Pages portlet, located on the "Manage Pages" page under Administration / Portal User Interface.
3. Click "New URL" button.
 |
4. On the "New URL" page:
Add the <script> tag to the web application:
- Add a title for page.
- Click the "HTML" checkbox and enter the URL to the external web application.
- Click the "OK" button.
Use the new Web Application Integration portlet to generate an HTML <script> tag :
1. Copy its unique name of the URL created in the previous step.
2. Open the Web App Integrator page and Paste it into the input field of the Web App Integrator portlet.
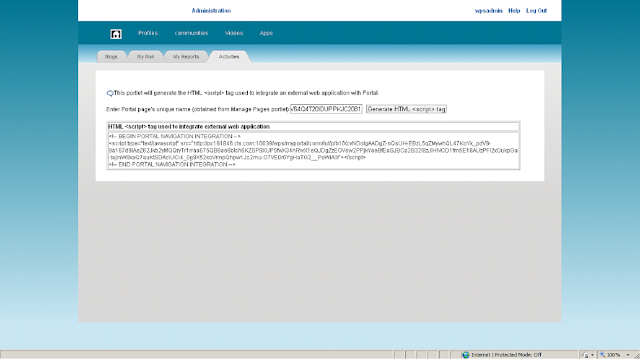
3. Click the "Generate HTML <script> tag" button in the Web App Integrator portlet. A text box will appear with a complete HTML <script> tag in it.
Note: This tag only integrates the external web application for the URL page specified as input.
Note: This tag only integrates the external web application for the URL page specified as input.
Add the <script> tag to the web application:
1. In the header component of the external web application, locate the code which generates the HTML <body> tag markup.
2. Copy the entire content inside the <script> tag and paste it in a browser and save the generated markup as a jsp file. For example save it as “wai_activity.jsp”. As shown the figure below.
3. For example we are modifying the Activity feature of IBM Connections. Go to the IBM Connections installation directory and open the mainpage.jsp. It can be found in the following location
\installedApps\Activities.ear\oawebui.war\WEB-INF\jsps\webui\mainpage.jsp
4. Copy the “wai_activity.jsp” that we saved in the previous step and paste it in the same location where the “main .jsp” is present.
5. Open the main.jsp and and include the “wai_activity.jsp” immediately after the <body> tag.
<jsp:include page="wai_activity.jsp" />
6. Open the “wai_activity.jsp” and verify the css, js and images file path. If the path is relative then prepend the proper host and port name. For example the jsp will have the path like
<link type="text/css" rel="styleSheet" href="/MyThemeSkin/themes/html/MyTheme/css/stylescog.css" />
<link type="text/css" rel="styleSheet" href="/MyThemeSkin/themes/html/MyTheme/css/tabmenu.css" />
<link type="text/css" rel="styleSheet" href="/MyThemeSkin/themes/html/MyTheme/css/base.css" />
Prepend the proper host and port name to make it correct.
<link type="text/css" rel="styleSheet" href="http://pc161846.xyz.com:10039/MyThemeSkin/themes/html/MyTh eme/css/stylescog.css" />
<link type="text/css" rel="styleSheet" href="http://pc161846.xyz.com:10039/MyThemeSkin/themes/html/MyTh eme/css/tabmenu.css" />
<link type="text/css" rel="styleSheet" href="http://pc161846.xyz.com:10039/MyThemeSkin/themes/html/MyTh eme/css/base.css" />
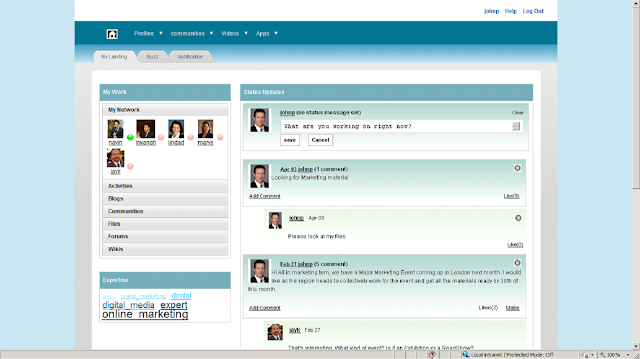
This step will complete the process and now user can experience a seamless traverse from WebSphere portal and IBM Connections. Following figures show the navigation between portal and Connections. Following is the example
1.Go to portal home page
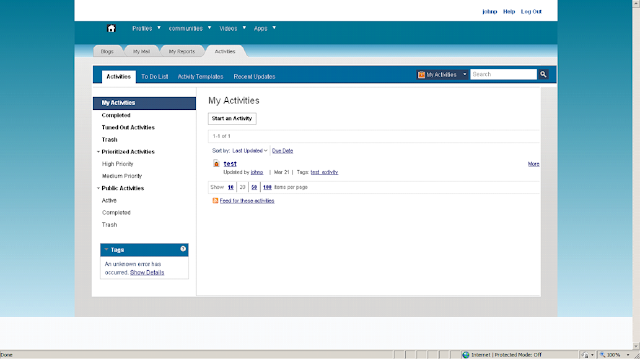
2. User clicks the activities link from drop down.
3. This page shows the content from Connections Activities. All the Content is of Connections. This way user can traverse from portal to connection seamlessly.
If user wants to conditionally display Portal navigation when the user links to the web application through Portal, your code needs to do two things
1. Append a parameter “fromPortal=true” to the application URL defined on the Portal URL page. For example:
https://pc182041.xyz.com:9444/activities/service/html/mainpage?fromPortal=true
2. Now, in the web application’s header component where the Web App Integrator jsp is included, user can add code which checks for that URL parameter. If the URL parameter is present and set to true, the Portal navigation is displayed. Otherwise, the navigation is not displayed. Following is the code snippet.
<c: if test ="${param.fromPortal == 'true'}">
<jsp: include page = "wai_activity.jsp" />
</c: if>
References:
http://www-10.lotus.com/ldd/lqwiki.nsf/dx/using-the-web-application-integrator-for-ibm-websphere-portal
http://www.ibm.com/developerworks/websphere/library/techarticles/0901_debinder/0901_debinder.html


No comments:
Post a Comment